Wednesday, April 17, 2024

In My Heart

Hello friends, I'm back yet again this week, this time with a fun card for the current challenge at The Paper Players.  Claire has chosen some yummy, vibrant colors and I knew immediately what stamp set would work best with them.

I have had this cute stamp and die set for months but never used it so when I saw these colors I knew it was time to put it to use.


I stamped out all the images, colored them with Copic markers and then used the dies to cut them out.  The sentiment is from the set but I only used part of it, masking off the part I didn't want to include, then used a paper trimmer to size it appropriately.

Next the brick background was stenciled with gray about 2/3rds of the way down the panel, trimmed down to 4" x 5.25", then I built the scene, adhering everything directly to the panel except for the planters on each side, which were popped up with foam tape, as was the sentiment.  


Thanks for taking time to stop by!  I hope you're having a good week and that Spring has finally arrived where you are.  Here in Meridian, our weather keeps vascilating between 50s and 70s but I'm hopeful that by next week we'll be well into warmer weather. ;-)

Take care!

Stef

  • MFT Sittin' Pretty stamps and dies
  • MFT English Brick Wall stencil
  • Simon Says Stamp Earl ink
  • Copics - RV19, 09, 06, 04, 02, BG49, 13, 11, YG67, 17, 03, 01, YR27, 24, 15, 11, E11, 21, 00, C5, 3, 1, 00, W5, 3, 1, 0

Tuesday, April 16, 2024

Wild & Free for Color Hues

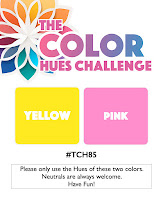
Hello friends!  Are you ready for a new color combo?  We have you covered at Color Hues, where the lovely Hannelie has chosen pink and yellow.  So perfect for Spring, right?


I couldn't resist making a card with flowers using these colors and of course I added a bit of gold metallic as well. ;-)


The April card kit at Simon Says Stamp had me swooning with the pretty floral stamps, so of course I inked up one for this card.  It was gold heat embossed, along with the sentiment from the same stamp set, and then I did some simple coloring of the flowers with yellow Copic makers.  I die cut both with the coordinating dies, then went to work on the background.

Pink ink was ink blended on a panel of white cardstock, darkening the edges while leaving the center a lighter color.  It was embossed with the Floating Flowers folder that came with the kit, then I used both gold and white to splatter although the white is very subtle, even in person.

After the panel dried, it was adhered to a 4.5" x 6" card base.  A pretty die cut circle was layered on, then the flower and sentiment were added.  With all the gold splatter I didn't think any bling was needed.


So what are you inspired to make with these colors?  We sure hope you'll share your wonderful creation with us, the challenge remains open until 9am EDT April 29th.  For more inspiration, you don't want to miss what my super talented teammates have made, so please be sure to pop over to the challenge blog!

Take care and thanks for visiting!

Stef

  • SSS Wild & Free Flowers Stamps and Dies
  • SSS Floating Flowers ef
  • Altenew Baby Pink Crisp Dye ink
  • Altenew Gold Metallic paint
  • Dr. Ph Martin's Bleed Proof White paint
  • Copics - Y15, 11, 00

Monday, April 15, 2024

Big Bold Blooms Birthday for The Flower Challenge

Hello friends!  We're at mid-month and time for our reminder post at The Flower Challenge.  This month we are adding layers to our floral cards.  

This time I used a die cut floral spray to create layers and since I'm using new products, I'm also sharing over at Darnell's April NBUS Challenge. 


I recently had a little shopping trip to Spellbinders and picked up the Copperplate Sentiment press plates and the Big Bold Blooms dies.  Betterpress ink in Bark was used to press the happy birthday sentiment onto a panel of the Betterpress porcelain paper.  The spectacular calligraphy used for the sentiment font absolutely makes me giddy, it's so beautiful!

Next all the spray components were die cut from white cardstock, then the leaves and flowers were ink blended with a number of Distress inks and I used brown Copic markers to color the little branches and flower centers, and warm grays to shade the white buds (?berries?).  Creating floral arrangements does not come naturally to me so I definitely borrowed ideas from the card samples for the Copperplate Sentiments on the SB website.  The colors were ones used by Amy R in this post on Prairie Paper and Ink, which was for Color Throwdown #787.  I love me some aquas and teals, and when paired with olive green, well, it just makes my heart happy!

After building the spray and adhering it to the card front, the last step was to add some bling with three Simon Says Stamp Surf Dazzling Gems.


If you haven't already, we'd love to have you show your layers, or share a second card!  Be sure to head over to the blog for all the beautiful inspiration from my wonderful teammates.

Thanks for visiting.  Take care!

Stef

  • Spellbinders Big Bold Blooms and Envelope of Wonder (2 leaves) dies
  • Spellbinders Copperplate Happy Birthday Press Plate
  • Salvaged Patina, Peacock Feathers, Uncharted Mariner, Crushed Olive, Peeled Paint and Rustic Wilderness Distress inks
  • Copics - E44, 47, W0, 1, 3, 5

Sunday, April 14, 2024

Birthday Wishes

Hello friends!  Another day, another card!  This time I'm playing along at Seize the Birthday.  Nancy has a fun challenge for us to use green and one other color, and of course make it a birthday card.

I hadn't made a mini or regular slimline card for a while, so I decided a mini slim would work well with the floral image I wanted to use.


Everything on the card but the frame is from the April 2024 Simon Says Stamp card kit.  I started by coloring up that pretty wild flower in a vibrant pink and of course greens for the leaves.  Next I flipped through the patterned paper selection from the kit and found this pretty green with a subtle floral pattern.  

After it was trimmed down and added to the card base, I decided to frame up the floral using a Pinkfresh Studio mini slimline frame, layering it up twice before adding to the card front.  The flower was partially adhered to the paper with some of the petals and the small but popped up with thin foam squares.  After adding the sentiments, some jewels seemed in order, so I found some pretty pink ones that matched the flower so well.


Thanks for visiting, I appreciate it! Be sure to come back tomorrow for my reminder card for the current Flower Challenge (layers) and on Tuesday when we have a wonderful new challenge with perfect spring colors over at Color Hues.

Take care!

Stef

  • Simon Says Stamp Wild and Free Flowers stamps and dies
  • Pinkfresh Studio Essentials: Mini Slimline Frame die
  • American Crafts Dreamer 6x8" paper pack
  • SSS Taffy Dazzling Gems
  • Copics - RV19, 06, 04, 02, YG67, 17, 03

Saturday, April 13, 2024

Touched Beyond Words

Hello friends!  I hope you're having a great weekend.  Today I'm sharing a card that I made for the current challenge at Freshly Made Sketches.

I love Jen's simple sketch and it was just perfect for using a big floral.  My card ended up being a square 5" x 5".


This large flower image is from Altenew's Vintage Garden and while I've had the stamp set a while, I hadn't inked up and colored this image as of yet.  For the flower petals I used Copics in a part of the RV family I don't typically reach for because they are more on the red side and I'm more inclined to like pinks.  Good to get out of your comfort zone, right?  The leaves were colored with Altenew Artist markers.

For the background, I ink blended a panel with some light greens at an angle starting at the upper right and fading off to white towards the middle.  It was then embossed with a 3D folder but the texture was so pronounced I didn't like it for this particular card, so I ran it through my die cut machine a second time just between the plates to lessen the embossing - it's not totally flat and it worked better for adhering everything.  

The flower was added to the white scallop circle that had been die cut three times, then the sentiment and gems finished things off.


Thanks for taking time to drop by!

Take care!

Stef
  • Altenew Vintage Garden Stamp and Die
  • Spellbinders Tile Motif 3D embossing folder
  • Spellbinders Betterpress You Are Everthing Sentiment press plate
  • Hero Arts Scallop Circle die
  • HoneyBee Stamps Aurora Borealis Gems
  • Copics - RV21, 23, 25, 19
  • Artist Markers - Aloe Vera, Matcha Tea, Swamp Green

Tuesday, April 9, 2024

A Botanical Thanks

Hello friends!  I'm dropping in with a fun post, sharing a card I made last week after watching a YT live with Gina K and Jennifer McGuire here. For this live, they showed different techniques for using background stamps and I've incorporated one in my card today that Jennifer shared.


This particular technique involves stamping your panel with a background stamp inked with either white pigment ink or a watercolor ink such as Versamark. When completely dry, you ink blend over it to get a subtle design.  The Versamark resists the ink, while the white pigment ink takes on a darker hue.  I made several backgrounds but this was my favorite.  

For this card, I used the Simon Says Stamp Botanical Split Background stamp for mine, inking it up in HoneyBee Stamps white pigment ink and letting it dry over night.  The next day, I ink blended it with SSS Limelicious and Surf inks, then die cut it with a Spellbinders Postage Edge Rectangle die.


Next I stamped the sentiment and sub sentiment with SSS Ocean ink, then die cut them both.  I used the SSS Whirl Dragonfly die to cut from white, glued it together then added it along with the sentiments to the card front.  The last detail was to add some SSS Surf Dazzling Gems.  CAS but with lots to look at because of the background detail.


Thanks for taking time to stop by!  I hope you're having a great week and I'll be back on the 15th with my Flower Challenge DT reminder post.

Take care!

Stef


Thursday, April 4, 2024

Garden Tapestry for The Flower Challenge

Hello friends!  Here we are in beginning of April and at The Flower Challenge this month we are adding layers along with our flowers!

There are many ways to add layers and for this card, I added a panel cut with a cover plate die and also added layers under my main image for dimension.


The first step was to use the beautiful and intricate Pinkfresh Studio Garden Tapestry press plate with my BetterPress.  It was inked with Spellbinders Bark BetterPress ink, then I used the coordinating stencil to color the flowers and leaves.  I just love this delicate design.


Next came the die cutting.  The PFS Intricate Stitched Ovals Cover plate die left a subtle and beautiful design on the light peach panel, then added to the card base.  The stenciled image was die cut along with three additional layers, adhered together, the layered on the peach panel.  The sentiment was from a previous foiling session using SB More Sentiments foil plates and cut with the coordinating die, and I liked how the border seemed to coordinate with the background stitched design.  Lastly we couldn't go without a little bling, so I added some Studio Katia Gold Glitter drops, which also tied in the gold from the sentiment.


How would you add layers to your floral card?  Die cut flowers?  Layers of patterned paper? Frame?  All of the above? There are so many ways to go with this and for some wonderful inspiration, be sure to take a look at all the beautiful creations by my fellow DT members over at the challenge blog, then come play along with us!  The challenge will remain open until 5pm GMT (1 pm EDT) April 25th.  Be sure to swing back by on the 15th when I'll have my reminder post with a different way to add layers!

Take care!

Stef

  • PFS Garden Tapestry Press Plate, Die and Stencil
  • PFS Intricate Stitched Ovals Cover Plate die
  • Concord and 9th Nectar cardstock
  • PFS Peach Fuzz, Coral Berry and Clementine inks; SSS Limelicious and Pearfection inks; SB Bark BetterPress ink
  • Studio Katia Gold Glitter Drops